Lecture Notes - Week 6
Readings
- Chapters:
- 16 - Adding Data Using the Web Application
- 17 - Removing Data Using the Web Application
- 18 - Editing Data Using the Web Application
Screencasts - Week 6
Outline of Topics
-
Creating a Web Page to Add Student Data for our Simple Application
-
Creating a Web Page to Remove Student Data for our Simple Application
-
Multiple Ways to Navigate to a Single Page
-
The Web is Stateless!
-
-
Creating a Web Page to Edit Student Data for our Simple Application
Lecture
Creating a Web Page to Add Student Data for our Simple Application
We want to be able to add new students to our simple application we started in the last lecture. We're going to need another script with a form that looks like this:

We also want this page to display confirmation when the student is correctly added to the database along with a link to add another:

Additionally, we need a way to navigate to this new page, so we'll add a link to the main Student Listing index.php page:

Let's create a a script for adding student data to our Student Listing application and call it addstudent.php
Creating a Web Page to Remove Student Data for our Simple Application
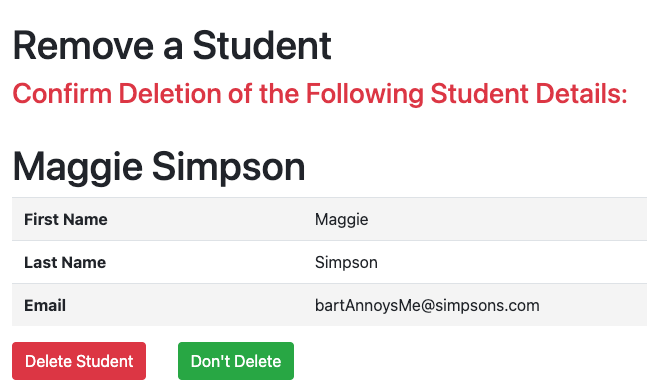
We want to have the capability to remove student data from our simple application as well, so we're going to need another script with a form that looks like this:

We'll add links with a trashcan icon to the main Student Listing page as well so we can select which student's data we need to remove:

Later on, we'll restrict the access for removing student data by adding administrative authentication.
Let's create a script for removing student data from our simple application and call it removestudent.php.
Multiple Ways to Navigate to a Single Page
As you can see below, the page displays the student details of the student to remove, along with two buttons. This gives the user a choice to remove the student or not.:

Because this is a self refencing page, when the user selects one of the buttons (Delete Student or Don’t Delete), the removestudent.php script is called with the name attribute of the button selected. The student id attribute is sent and parsed into the $_POST[] superglobal array.
There are two other ways a user can navigate to the removestudent.php script. First, by selecting one of the trashcan links for a student to remove from the index.php page. Another unintended mechanism would be to type removestudent.php into the URL address bar of the browser. That is, without the query parameter containing the student id.
Let's head back to our removstudent.php script to see how we handle this.
The Web is Stateless!
THE WEB IS STATELESS! When the user selects the Delete Student submit button, the action is to re-render the removestudent.php script and send new data to the page through the $_POST[] superglobal array. However, all of the previous variable data from the PHP code (as a result of the last navigation to removestudent.php from the index.php page) is gone. The definition of "Stateless" behavior is that all data is communicated in a single HTTP request and response between the client (browser) and the server. This data is only present for the current HTTP request/response transaction. Using hidden variables in a form is one way to keep information between transactions (after linking to a different or the same page). In subsequent chapters on Cookies and Sessions, we explore other techniques we can use to persist data as a user navigates between the pages in our application.
Let's head back to our removestudent.php script and see what happens when we delete the student.
Creating a Web Page to Edit Student Data for our Simple Application
We also want to have the ability to edit a student listing as well. We will want to navigate to this editing function from the Student Listing Details page:

Later on, we'll restrict the access for editing student data by adding administrative authentication.
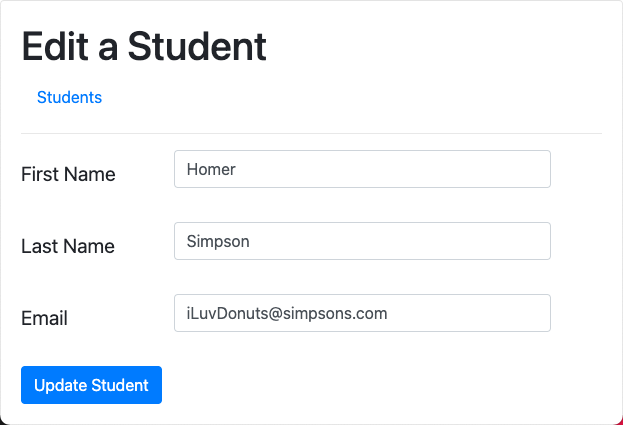
And we want our Edit a Student page to look like this:

Let's create a script for editing student data for our simple application and call it editstudent.php.